I've been a keen photographer for a number of years and since I started blogging on Philofaxy I've been trying to improve my own techniques to take better pictures of my organisers. So here are some tips on how to take better pictures.
Firstly Filofax organisers aren't the easiest subjects to take photographs of, sure they stay still when you tell them to, but they are relatively small, so in normal circumstances you will be quite close to your subject.
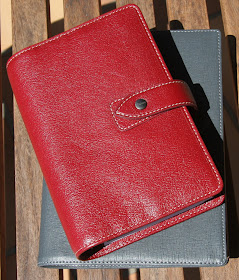
So my first tip, try to use natural light were possible, either next to a sunny window or like I often do, on a table outside. What ever camera you use the more natural the light, then there will be quite an improvement in your pictures. With indoor lighting or with flash your camera has to try to make up for the lack of light and so on digital pictures they will look noisy and also they will look quite flat and lack sharpness.

Try to take pictures from different angles, or zoom in on a particular feature or part of the design like I did with this shot:
I often crop my photos afterwards on the computer, but I don't change many settings just crop and save with most of them. It gets rid of wasted space in the photograph and concentrate on the Filofax not the surroundings.
By taking your pictures in sunlight you have better control of the 'depth of field', this is the range of distance between your camera and the background that is fully in focus.
Here is a classic example of very 'shallow' or narrow depth of field, the rings are in focus, but the pen in the foreground is totally out of focus and the address card in the clear envelope gets progressively out of focus the further away it is.

This technique can be used to your advantage if you are trying to get rid of a distracting background. By taking your pictures on a plain background and in good light you can avoid these problems of things being out of focus like in the following picture of the Aston:

If your camera lens can take filters, try fitting a polarising filter to your lens, I've found this can reduce the 'glare' you get off the shiny surface of the leather organiser and it then brings out the natural colour of the leather.
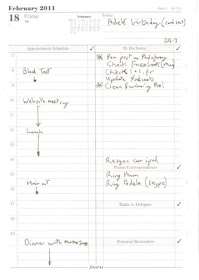
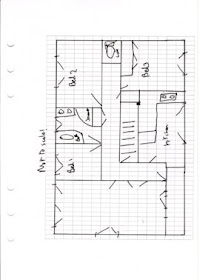
When you are taking photographs of the interior of your Filofax to show off your inserts, try to show them with some content on the pages, even if you have to create some 'dummy' entries, which I will hold my hand up to doing before now!!


In fact, the plan is of our house here, but you didn't know that until now!
Even if you only need two or three pictures for your blog post, take plenty of pictures, it's far easier to discard them at a later date after you have written your post than to have to set it all up again, like I had to do once. I took a series of pictures, took all the organisers inside and then noticed another one sat on the table.... 'Doh' back outside again start again!
The more pictures you take the better your technique becomes anyway, so try varying the camera position and angle, stand back a little and zoom in. Small changes can make quite a difference some time.
In full sunlight be careful where you stand as you don't cast a shadow across the subject.
So it is now time to take the lens cap off and try taking some more pictures... enjoy.


Brilliant Steve, thank you for these tips!!
ReplyDeleteExcellent Steve - I'm just a point and shoot girl - must try harder!
ReplyDeleteThank you, I wanted to avoid the debate that you must have an xyz type camera, because it just clouds the issue and puts people off.
ReplyDeleteSure with some cameras you won't have all of the options in the post, but just using natural light on a bright day then most cameras will perform better and you should get better pictures, even with a camera phone.
Thanks Steve for another useful post.
ReplyDeleteAlison... even on a point and shoot you can set the camera up to personal settings to recreate some of these ideas.
ReplyDeleteAs a pro photographer ( I even have letters after my name.. and I don't mean WALLY!!) all of Steve's ideas are great!! But can I just add, that if you are having a problem with glare on your filofax, you can also hold a bit of black card above the item you are photographing and it will reduce the glare. An alternative is, to hold a piece of white card above to introduce some highlights.
Thanks for bringing this up.
Thank you, i know i should of done all thsi last night taking photos of the Domino BUT when i get home there isnt enough light to take photos properly after i have got ready to do things so i had to use my flash, i did make a plain pink background tho lol
ReplyDeleteThanks Steve - those are all sound tips.
ReplyDeleteif you have an SLR/DSLR and flash, you can bounce the flash and/or use a diffuser to soften the flash. I use that a lot with my photos and it seems to give a better result.
ReplyDeleteaww, you changed the typo in the title! I liked "photographying" - made it sound all fancy!
ReplyDeleteThanks Steve. Great tips here.
ReplyDeleteThanks for sharing. Since doing my photography course (very beginner level with my DSLR) I am finding our that it is the photographer (and their little tricks) that make a decent picture, rather than an expensive camera.....
ReplyDeleteNatural light is so important... I avoid using the flash where possible as it causes all sorts of issues (that I don't know how to deal with yet!).
The only other tip I'd add about taking photos is to use sunlight, but avoid direct sunlight. Quite often you'll need to content with glare. I like to take my photos next to a window where the light is streaming in, but it's not going to change the colour of the item I'm photographing or cause glare/shadows.
ReplyDelete