
I've recently seen people taking the rings out of Filofax organisers and converting them to notebook covers. In most cases this is a one way trip, there is no turning back once the rings have been removed.
I thought it might be possible to come up with a solution that was reversible, should you want to restore it to a ring bound organiser, and without doing any visible damage to the leather organiser, hence retaining its value.
This modification only works with an organiser with removable rings not ones that are riveted in. But I think you will be able to follow the steps easily enough from the photos below.
Once modified, the swap from rings to 'elastic strung' and back again to rings can be achieved quite quickly.
So take your organiser, a personal size one in this case.

I used a slim bit of plastic to slide under the ring mech to lift the latch.

Alternatively follow the first part of this video on how to remove the rings.
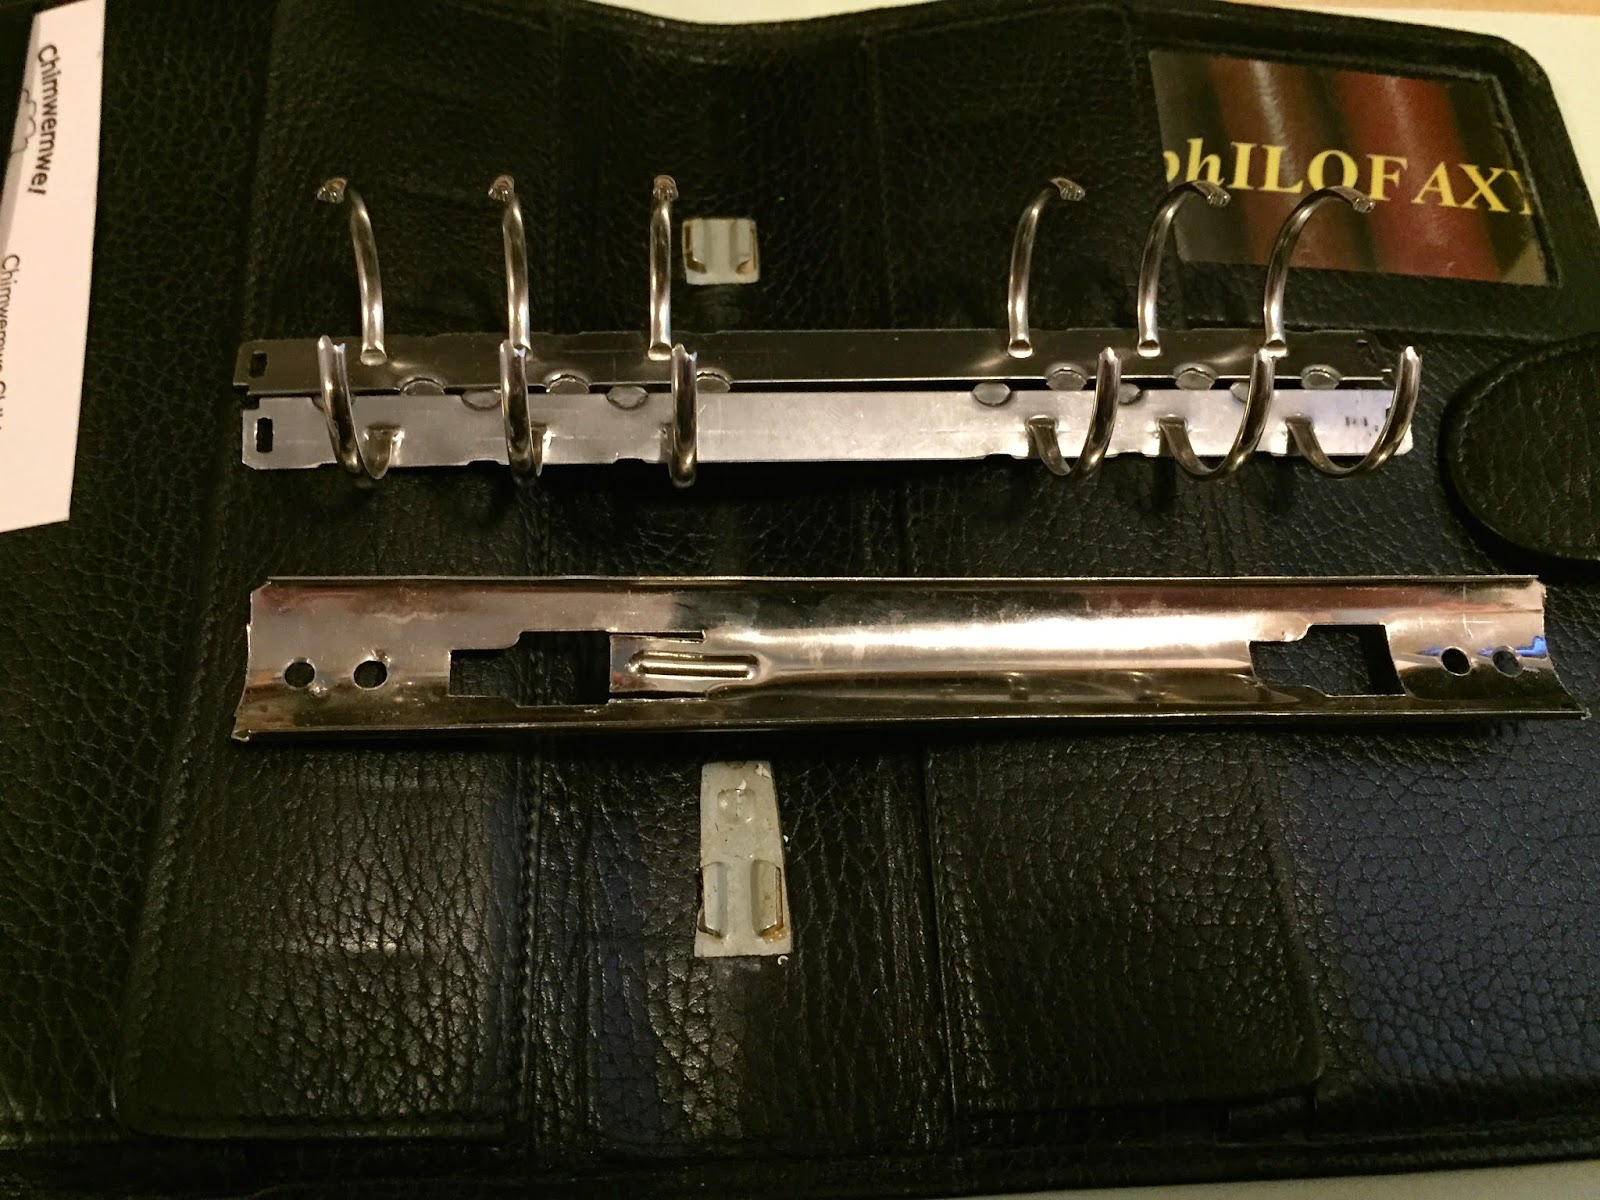
With the ring mech removed from the organiser. We then need to take it apart. Again watch the video if you haven't done this before.

Firstly remove the cover plate by easing it off a section at a time down one side.

With the rings open now remove the tabs and pop them to one side.

Then remove the ring halves too and put them to one side with the tabs.

Now to use the base plate with elastics we need 4 holes, two at the top and two at the bottom. These are in a similar pattern as you would have the 4 holes in the spine of the leather cover on a conventional Travellers Notebook.
With the ring mech I was working with there was already a hole in the base plate at the top and bottom so I drilled some extra holes.


Now you could drill extra holes say 6 at the top, 6 at the bottom if you wanted 3 elastics, but I thought 1 would be enough to prove the concept. I made the holes a reasonable size to make threading easier!
I then threaded this thick elastic through, it is thicker than normal, but it shows up better in the photos. The short length is tied together on the inside of the back plate with just the small loops going on the outside top and bottom on the back of the mechanism.

Once tied, you can then put the cover plate back on, this hides the short length and the knot joining the ends together.

Here you can see the short loops going between the holes on the back of the plate.

And at the other end just the same.

The longer loop comes out of the existing hole in the cover plate where the tabs would normally be. No modifications are required to the cover plate.

Now you can reinstall the base plate on the lugs as before and you now have your ring-less organiser.
If you wanted to, you could cover over the holes were the rings come through the cover plate with some Washi Tape, but with the booklets in the organiser you will not see them really.

I made a very simple notebook to fit. Being this is personal size the page size would normally be 171x95mm. But without the rings it can take wider paper...
The closest I had to hand was some A5 paper (210 x 148 mm) folded in half that becomes 105 mm x 148 mm. OK this is 22mm shorter than the ideal 170mm but the perfect width. So I made a cover that was 170mm high and 110 mm wide and stapled in my DiY booklet.
The cover being bigger stops the pages from moving up and down on the elastic. But if you were doing this modification on an A5 organiser... you would be fine with A5, Moleskine Cahiers without needing to worry about this.

You an string in additional booklets with elastics passing under the main one in just the same way as you would in a normal Travellers Notebook.
This particular organiser would normally have 30mm rings in it, that gives it enough capacity for 5 or 6 booklets easily.
So then you want to swap it back to a ring bound organiser.... Simple, remove the booklets, then remove the base plate, this time it is quite easy, because with no rings you can simply remove the top cover, lift the latch and slide if off the lugs. Remove your elastics. Then rebuild the rings, as below.
Once reassembled. as below.

You put the rings back on the lugs with the latch down until you hear it click.

And Robert is your mothers brother.....
A Filofax Cabriolet.... the best of both formats.
What started this idea.....
A Gillio A5 Mia Cara... in ring mode.

Which also takes my new Gillio Giramondo Notebook perfectly, may be this should be called a Gira Mia or a Mia Mondo

But the cover would also take a Filofax Flex leather A5 cover as well

Now not everyone is going to want to use a Gillio Mia Cara in this way I realise, but I was just exploring the possibilities.
I hope this inspires a few people to try to take an alternative route to trying out ring-less organisers.
Cool video. Nicely done. I was almost waiting for you to say "Here's one I made earlier".
ReplyDeleteThanks, Steve, for this excellent and clear tutorial.......
ReplyDeleteNot sure if I will go this route, but interesting to see regardless..
Mark
How would you remove the lugs? Thanks for the info!
ReplyDeleteDo you mean the lugs, or the tabs?
DeleteThose 2 pieces that are left after everything else is removed. I believe they are glued to the leather?
DeleteRemove those and you can't put the rings back in again... but whatever... they are attached to a curved metal plate that is glued between the inner and outer leather covers.
DeleteThis post has more details:
http://philofaxy.blogspot.com/2015/02/ring-mechanisms.html#more
I would like to try this on my personal filofax domino, however, it has a different ring plate. Do you have any suggestions on how I can safely modify my domino? thanks!
ReplyDeleteGenius, nice one!
ReplyDeleteThanks for the video. I managed to move the entire ring mechanism (A6) to another cover (meant for a notebook). :)
ReplyDeleteIs it possible to do this in a filofax personal croc?
ReplyDeleteI am keen to convert one to a tn, but I don't want to damage the leather
Sadly no, this is because the Filofax uses a different type of mounting method which is very secure and that makes it difficult to remove the ring mech to work on it without doing damage to it.
DeleteThat said you can remove the top plate easily enough, you could then remove the ring halves. But leave the back plate in situ and put your strings around the top plate and then clip it back in place. It will not be quite as secure, but it shouldn't do any damage and it will be reversible.
Contact me if you need further assistance with explaining this.