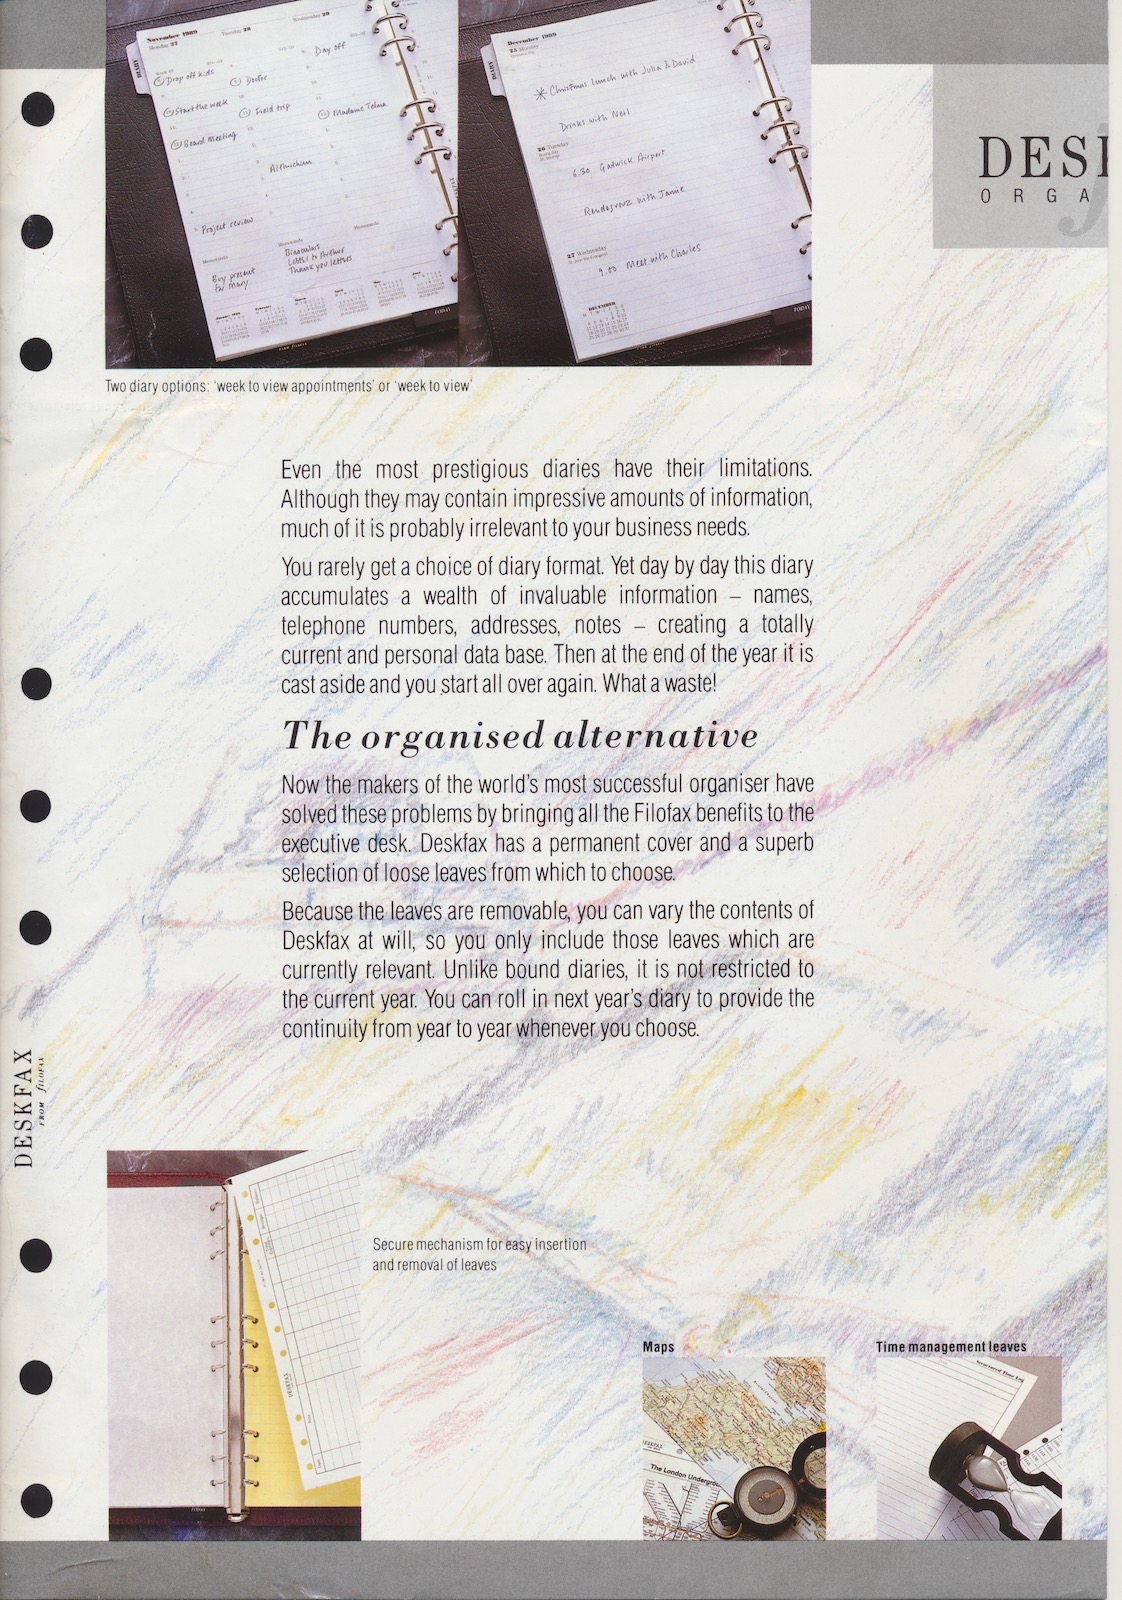
This brochure was sent to me along with a huge amount of other catalogues and inserts from a reader in Australia. I will be working through the 'collection' in the next few weeks. This brochure was a quick and easy one to scan in and share with you.
This brochure dates from about 1989 and compares the Filofax Deskfax with the Filofax Personal models.
You can find higher resolution scans of these pages here.
The scans are reproduced here for educational and research purposes only.
Showing posts with label Deskfax. Show all posts
20 August 2020
25 March 2019
Deskfax
Could the Deskfax make a return? Although Filofax gave up on the size many years ago, the page size is at least an ISO standard size. B5 (176 x250mm) is bigger than A5 (148x210mm) but smaller than A4 (210x297mm). So a good compromise.
The B6 size (125x176mm) is starting to become a popular size as well now. Van der Spek have B6 sizes available in their custom range. B6 is a similar height as Personal size, but 30mm wider. It started to be popular amongst Travellers Notebook users, but it has spread to ring bound organiser users as well now.
The biggest hurdle for any new production of Deskfax organisers is a source of good quality ring mechanisms. Krause don't currently make them and would require an order of 1000 units to do so anyway. I believe people have seen 9 ring mechanisms on some of the Far Eastern web sites.
Deskfax organisers have 9 rings as opposed to 6 rings for nearly all other ring bound organisers. The nine rings are in three groups of three. The three rings in a group are in the usual 19mm spacing. With the groups spaced by 51mm, or if you take a personal page it will slot on to either the top set and middle group of rings, or alternatively the middle group and the bottom set of rings.
This of course means that you can use a Personal page punch to punch Deskfax page by punching the top of the page first then turning the page over to punch the bottom of the page, making sure that the middle group are a common set of holes. With a bit of practice it's relatively easy to do.
For other posts on Deskfax check out past posts here on Philofaxy.
Have you ever tried out a Deskfax? Do you own one?
The B6 size (125x176mm) is starting to become a popular size as well now. Van der Spek have B6 sizes available in their custom range. B6 is a similar height as Personal size, but 30mm wider. It started to be popular amongst Travellers Notebook users, but it has spread to ring bound organiser users as well now.
The biggest hurdle for any new production of Deskfax organisers is a source of good quality ring mechanisms. Krause don't currently make them and would require an order of 1000 units to do so anyway. I believe people have seen 9 ring mechanisms on some of the Far Eastern web sites.
Deskfax organisers have 9 rings as opposed to 6 rings for nearly all other ring bound organisers. The nine rings are in three groups of three. The three rings in a group are in the usual 19mm spacing. With the groups spaced by 51mm, or if you take a personal page it will slot on to either the top set and middle group of rings, or alternatively the middle group and the bottom set of rings.
This of course means that you can use a Personal page punch to punch Deskfax page by punching the top of the page first then turning the page over to punch the bottom of the page, making sure that the middle group are a common set of holes. With a bit of practice it's relatively easy to do.
For other posts on Deskfax check out past posts here on Philofaxy.
Have you ever tried out a Deskfax? Do you own one?
Labels:
Deskfax
17 September 2017
Paper sizing and scaling - Update
It is the season of printing inserts ready for the new year. A season of confusion may be, trying to remember all those things about sizes and printing and print settings.
You are nodding your head I know! It is ok even I have to think hard about this stuff annually.
The three different sizes shown A5, B5 and A4 are common sizes. I've added the dimensions to show their actual sizes.
A4 is twice the area of A5, A5 is twice the area of A6 etc. Similarly B4 is twice the area of B5, B5 is twice the area of B6 etc.
These three sizes are all ISO216 paper sizes, ISO216:2007 specifies three different series of paper sizes, A, B and C. One thing in common is that the ratio of height against width is the square root of two. So if you multiple the width by 1.4142 (the square root of 2) you will magically get the height to within 1 mm. Alternatively multiple the height by 0.7071 and you will get the width of the page.
Because they follow this pattern we can easily scale from one size to another when printing. So for instance if you have a Word file that is set to A4 size to print it on A5 paper you scale the page by 0.7071, or more conveniently 70.7% or 71% if you can't input a decimal number.
Note that the reduction between each size is not 50% even though the smaller size has half the area. The scale factor for reduction is calculated by dividing the longer edge of the smaller size by the longer edge of the larger size (or the shorter edge of the smaller size by the shorter edge of the larger size).
It wouldn't be so bad if you used this information every week, it might become second nature, but for most of us it is information we only use once or twice a year.
So let us start with a picture.
The three different sizes shown A5, B5 and A4 are common sizes. I've added the dimensions to show their actual sizes.
A4 is twice the area of A5, A5 is twice the area of A6 etc. Similarly B4 is twice the area of B5, B5 is twice the area of B6 etc.
These three sizes are all ISO216 paper sizes, ISO216:2007 specifies three different series of paper sizes, A, B and C. One thing in common is that the ratio of height against width is the square root of two. So if you multiple the width by 1.4142 (the square root of 2) you will magically get the height to within 1 mm. Alternatively multiple the height by 0.7071 and you will get the width of the page.
Because they follow this pattern we can easily scale from one size to another when printing. So for instance if you have a Word file that is set to A4 size to print it on A5 paper you scale the page by 0.7071, or more conveniently 70.7% or 71% if you can't input a decimal number.
Note that the reduction between each size is not 50% even though the smaller size has half the area. The scale factor for reduction is calculated by dividing the longer edge of the smaller size by the longer edge of the larger size (or the shorter edge of the smaller size by the shorter edge of the larger size).
Using that rule we can devise how to go from A4 to B5, so we take 250mm and divide it by 297mm to get 0.841 or just 84% should be close enough.
What is the significance of B5 size you might ask.... B5 is Deskfax size, whilst Filofax have discontinued this size years ago, it still remains a popular size, although printed inserts for this size are difficult to come across. With the knowledge of the scaling factor of 84% you can take any of the Philofaxy diary inserts intended for A5 size and print them at 84% and you will have Deskfax pages.
All the Philofaxy diary inserts for A5 are in fact sized to A4 this is so if you use the 'Booklet' print facility available on some printers they will be printed the correct size on A4 paper (two pages per side) If you are printing the files directly on to A5 paper you have to scale the print to 71%.
To help you remember this information I have created an 'aide memoire' which you can either put on your notice board or print out and put in your organiser.
12 December 2016
Guest Post – Recreating the Original Deskfax by gmax
Many regulars will be familiar with the 9 hole Deskfax format. You can read all about it in Steve’s post here, and also the guest post of its devotees. The size appeared in 1988, at one stage being temporarily renamed to Professional format.
However, Deskfax started out as quite a different beast. The original Deskfax had 6 rings, exactly the same as personal, but with double width pages. There aren’t many of those around – they were introduced in late 1985 or early 1986, and production only ran for a couple of years. Some photos of what they looked like are available here.
The beauty of the double width paper, for me, is that it’s a much better size for any serious writing. Much as I love the standard personal leaves, I’ve always found them just too small for effective note-taking.
Of course another advantage is that the double-width leaves can just fold and fit in a normal personal Filo, but I’d been in search of a binder that would allow me direct use of the double leaves.
I flirted with the unusual Japanese HBxWA5 size from Ashford, which is A5 width. While I like using this one, the leaves are rather square in shape, and it’s still not quite the perfect solution for me.
I’d also heard of Van der Spek, and the possibility of them producing custom items, but that sounded prohibitively expensive, and it took me a long time to make enquiries.
In fact, when I did, I was pleasantly surprised. Although the extra quantity of leather to make a larger binder is obviously going to increase the cost, I asked for a very simple design, and Petra was able to quote me a price that was almost the same as that of their regular size of custom personal (which they call Standard). For a bespoke and one-off item, it seemed too good to miss.
Single-width personal leaves are 95mm, while the double width ones are 181mm (not numerically double, because they are designed to fold down to the single size and still fit on the rings). So we decided the binder would need to be made wider by the difference (86mm).
I ordered a few leather samples first. I was initially tempted to try to recapture colours of the old Filofax versions from that short period in the 1980s, but settled on the recently introduced “Gris-Blue Touch Me” leather for the exterior, with a dark blue, Italian leather for the inside to provide a nice smooth writing surface.
As I mentioned, my preferred design was a very simple one – stiffened covers, 25mm rings and no pockets, fastener or pen loop. And here is the finished article.

However, Deskfax started out as quite a different beast. The original Deskfax had 6 rings, exactly the same as personal, but with double width pages. There aren’t many of those around – they were introduced in late 1985 or early 1986, and production only ran for a couple of years. Some photos of what they looked like are available here.
The beauty of the double width paper, for me, is that it’s a much better size for any serious writing. Much as I love the standard personal leaves, I’ve always found them just too small for effective note-taking.
Of course another advantage is that the double-width leaves can just fold and fit in a normal personal Filo, but I’d been in search of a binder that would allow me direct use of the double leaves.
I flirted with the unusual Japanese HBxWA5 size from Ashford, which is A5 width. While I like using this one, the leaves are rather square in shape, and it’s still not quite the perfect solution for me.
I’d also heard of Van der Spek, and the possibility of them producing custom items, but that sounded prohibitively expensive, and it took me a long time to make enquiries.
In fact, when I did, I was pleasantly surprised. Although the extra quantity of leather to make a larger binder is obviously going to increase the cost, I asked for a very simple design, and Petra was able to quote me a price that was almost the same as that of their regular size of custom personal (which they call Standard). For a bespoke and one-off item, it seemed too good to miss.
Single-width personal leaves are 95mm, while the double width ones are 181mm (not numerically double, because they are designed to fold down to the single size and still fit on the rings). So we decided the binder would need to be made wider by the difference (86mm).
I ordered a few leather samples first. I was initially tempted to try to recapture colours of the old Filofax versions from that short period in the 1980s, but settled on the recently introduced “Gris-Blue Touch Me” leather for the exterior, with a dark blue, Italian leather for the inside to provide a nice smooth writing surface.
As I mentioned, my preferred design was a very simple one – stiffened covers, 25mm rings and no pockets, fastener or pen loop. And here is the finished article.

I was very impressed with the quality, and will be putting
it through its paces in the coming months.
Thank you to Max for sharing this with us.
31 August 2016
Guest Post - My Deskfax Collection – Part II - Alan
In the first part of this post, I discussed how useful I find the Deskfax format and showed the vintage Statesman models that I have. In this second part, I share the more recent models that I use extensively in my teaching.
I have two York Director Deskfax, one that was bought BNIB from Laywine’s, Toronto’s finest Filofax stockist and host of at least two Filofax Meetups, and one that I got well-used and slightly abused in an eBay purchase.
The well-used one is missing a ring opening tab, which means I use it a lot, as I don’t mind if it gets even more damaged in use. However, I am still quite careful when I open and close it by gently pulling on the rings.
The layouts of the post-Statesman models are more featured. In addition to the horizontal slit for the pad of paper at the back, the York has slit of business cards, a window pocket for one’s own business cards, the secretarial pocket and a zippered pocket and two pen loops.
29 August 2016
Guest Post - My Deskfax Collection – Part I - Alan
Thank you Alan for sharing with us more insight in to the now discontinued Deskfax model.
Several years ago, I became aware of the long-discontinued Deskfax format. To me, the Deskfax size seemed like a perfect complement to the personal format. I have been frustrated with the lack of hole-spacing compatibility between the personal and A5, and was intrigued when I discovered that the Deskfax had compatible hole spacing, nicely demonstrated in Steve’s post about the Deskfax size from March 2014.
Shortly after Steve’s Deskfax post, Kariné Tovmassian created a Facebook group dedicated to this format, The Fraternal Order of Nine Rings, which she wrote about in this post.
One thing that impressed me was the small amount of additional difference in desk space used by the Deskfax, which is B5 size, and the A5 size. This picture compares open Kensingtons in three sizes, Deskfax, A5, and Personal. While the Deskfax page is 21% larger than the A5, (250x176mm vs 210x148mm), the marginal desk space used seems to be less.
This picture also illustrates the hole spacing compatibility between the Personal and Deskfax sizes, and feature that I have not taken advantage of very often.
Another feature that has made the Deskfax useful to me is the overall dimension of the binder, which is almost identical to the North American letter page size. This makes it very easy to put a Deskfax with a stack of exams or assignments into a briefcase. If I used a conventional North American letter-sized binder, it would take up more space. This picture shows my old, well-used York on a stack of assignments. You can just see the pages underneath, and the sizes are virtually identical.
Enough of justifying myself. It’s time to show my collection. In today’s post, I will show you my vintage Statesman Deskfax models. The Statesman was designated DX1CLF5/4 for the larger 1.25” rings and DX1CLF7/8 for the smaller 7/8” rings, found in most personals. There were other leathers, examples being the crocodile print calf leather (CCF, instead of CLF), lizard print calf leather (LCF) and iguana print calf (DX1CLF7/8I).
First, we have the one that appeared in my recent post about fixing poppers, a Black DX1CLF5/4:
I have been using a frustratingly-manual layout I created in Excel™ that I created in order to have the same style and layout in my desk organizer and the Slimline Personal that I carry with me. It is do frustrating to use that I am not sure how much longer I will continue using it!
I also have two of these in burgundy:
I love the compactness of the smaller-ringed model, which I have in both black:
and red:
If I recall correctly, Filofax called this colour “Montana Red”.
I recently acquired DX1CLF7/8 that I have never used, as it has a lot of content that I don’t have the heart to remove. It was used as a promotional item by Capital Radio in 1991. As you can see, it is in near-perfect condition:
The layout of these models is extremely simple: Inside the Front Cover is a secretarial pocket and the back cover has a horizontal slit to slide in a pad of paper. There are no other pockets but there is a single pen loop on the back cover.
Now as much as I love these Vintage Statesman models, I don’t like using them in situations that required me to carry them around for one simple reason: The rings are not riveted. While the clip-in style of ring is preferred by many, they are simply not strong enough to withstand the stresses of carrying around a kilogram or more of pages! On several occasions I found that when I opened my briefcase, the ring mechanism had separated from the cover! This issue is not a great with the smaller-ringed 7/8” models, which I still use for a few classes. In my next post, I will share the rest of my collection, that all have larger, and riveted, rings.
Several years ago, I became aware of the long-discontinued Deskfax format. To me, the Deskfax size seemed like a perfect complement to the personal format. I have been frustrated with the lack of hole-spacing compatibility between the personal and A5, and was intrigued when I discovered that the Deskfax had compatible hole spacing, nicely demonstrated in Steve’s post about the Deskfax size from March 2014.
Shortly after Steve’s Deskfax post, Kariné Tovmassian created a Facebook group dedicated to this format, The Fraternal Order of Nine Rings, which she wrote about in this post.
One thing that impressed me was the small amount of additional difference in desk space used by the Deskfax, which is B5 size, and the A5 size. This picture compares open Kensingtons in three sizes, Deskfax, A5, and Personal. While the Deskfax page is 21% larger than the A5, (250x176mm vs 210x148mm), the marginal desk space used seems to be less.
This picture also illustrates the hole spacing compatibility between the Personal and Deskfax sizes, and feature that I have not taken advantage of very often.
Another feature that has made the Deskfax useful to me is the overall dimension of the binder, which is almost identical to the North American letter page size. This makes it very easy to put a Deskfax with a stack of exams or assignments into a briefcase. If I used a conventional North American letter-sized binder, it would take up more space. This picture shows my old, well-used York on a stack of assignments. You can just see the pages underneath, and the sizes are virtually identical.
Enough of justifying myself. It’s time to show my collection. In today’s post, I will show you my vintage Statesman Deskfax models. The Statesman was designated DX1CLF5/4 for the larger 1.25” rings and DX1CLF7/8 for the smaller 7/8” rings, found in most personals. There were other leathers, examples being the crocodile print calf leather (CCF, instead of CLF), lizard print calf leather (LCF) and iguana print calf (DX1CLF7/8I).
First, we have the one that appeared in my recent post about fixing poppers, a Black DX1CLF5/4:
I have been using a frustratingly-manual layout I created in Excel™ that I created in order to have the same style and layout in my desk organizer and the Slimline Personal that I carry with me. It is do frustrating to use that I am not sure how much longer I will continue using it!
I also have two of these in burgundy:
I love the compactness of the smaller-ringed model, which I have in both black:
and red:
If I recall correctly, Filofax called this colour “Montana Red”.
I recently acquired DX1CLF7/8 that I have never used, as it has a lot of content that I don’t have the heart to remove. It was used as a promotional item by Capital Radio in 1991. As you can see, it is in near-perfect condition:
The layout of these models is extremely simple: Inside the Front Cover is a secretarial pocket and the back cover has a horizontal slit to slide in a pad of paper. There are no other pockets but there is a single pen loop on the back cover.
Now as much as I love these Vintage Statesman models, I don’t like using them in situations that required me to carry them around for one simple reason: The rings are not riveted. While the clip-in style of ring is preferred by many, they are simply not strong enough to withstand the stresses of carrying around a kilogram or more of pages! On several occasions I found that when I opened my briefcase, the ring mechanism had separated from the cover! This issue is not a great with the smaller-ringed 7/8” models, which I still use for a few classes. In my next post, I will share the rest of my collection, that all have larger, and riveted, rings.
25 June 2015
Guest Post - Notes in HBxWA5 - Part 2- By gmax
We saw Part 1 yesterday, Part 2 continues with how Max is using this interesting size format.
Part 1 of this post introduced the HBxWA5 format, and my binder purchase from Japan.
So I decided to go with the format as designed, and make some notepaper in true HBxWA5 size.
I’d heard good things about Rhodia paper, and fancied trying their dot grid style. So I made a trip to Paperchase in Tottenham Court Road, London and bought a stapled A5 pad. The stapling and perforation means that the actual sheets are not full height A5, but this was fine for what I wanted. Only the width needed to be A5.
Judicious use of a rotary trimmer was required to get the sheets down to personal height. In fact only a small amount of the paper went to waste, as you can see from the trimmings on the left.
A standard personal sized punch was then all that was needed to get the note-taking setup completed.
I also managed to refactor the pad’s covers to make some rather nifty fly-leaves.
So now I’m all set for note-taking. If people are interested I will report back later on how the format is working, and what the binder is like to live with.
Thank you Max for sharing this with us.
Part 1 of this post introduced the HBxWA5 format, and my binder purchase from Japan.
One of the things that made me like the look of the new format
was its similarity to the short-lived original Deskfax, which had double width personal
leaves (unlike the longer-lived, nine ring Deskfax
that came a bit later). I did wonder whether a double-width leaf might fit the HBxWA5, and it does just fit as
you can see here. You could use it with double-width leaves if you kept them
folded upon shutting, but, unfolded, they would stick out too far when the
binder is closed.
I’d heard good things about Rhodia paper, and fancied trying their dot grid style. So I made a trip to Paperchase in Tottenham Court Road, London and bought a stapled A5 pad. The stapling and perforation means that the actual sheets are not full height A5, but this was fine for what I wanted. Only the width needed to be A5.
Judicious use of a rotary trimmer was required to get the sheets down to personal height. In fact only a small amount of the paper went to waste, as you can see from the trimmings on the left.
Thank you Max for sharing this with us.
Labels:
A5,
Deskfax,
guest post,
Other Sizes
24 June 2015
Guest Post - Looking for the middle way, via Japan - Part 1 - By gmax
I'm always interested in different size formats, and I'm sure some of you might remember the double width early Deskfax organisers. Well this is a little different to that even! Thank you Max for sharing this with us.
One of the long-standing dilemmas facing us is that of which format to use. In particular, I have seen much soul-searching here on Philofaxy about whether to opt for personal or A5. And, having decided one way, it seems a nagging feeling often starts that maybe the other way would be better.
I have always stuck firmly to personal myself, and it would be unthinkable for me to change, if only because the continuity of all my paper records would be broken. For me, personal is the ideal size for keeping a diary, lists, addresses and finances. There is just one thing I’ve found it less than perfect for, and that’s note-taking. The pages are just that bit too small and the rings intrude that bit too much for real comfort when writing at length.
Thus, even I, as a personal format devotee, was intrigued recently to discover a Japanese invention that aims to give the best of both personal and A5 formats in one. A company called Ashford has come up with a new format called HBxWA5. The “H” here refers to the page height, and B stands for Bible, which is the name used to refer to personal size in Japan. The “W” refers to the page width, and A5 is as you would expect (i.e. the ISO A5 standard paper size). So what we end up with is a hybrid – basically a widened personal leaf that extends to the width of A5.
As I’ve implied, A5 has never been a temptation for me, but HBxWA5 was different. The holes are all still in the “right” places, and it might at last let me make notes comfortably. So I felt compelled to give it a try.
Ordering from Japan is more of an adventure than my typical internet shopping. I used Rakuten, which allows you to make the order, including payment details, and then passes it to the particular shop/vendor to be processed. This does take a while to happen, and leaves you wondering for a few days as to what the postage and packing is going to come to, but it all seems to work fine, and my parcel arrived a couple of weeks later.
The leather on the binder I ordered is black, with contrast stitching in an unusual and attractive purple colour. The rings are at the same places that personal format uses, and have a 15mm inside diameter. I’m hoping this will be more portable than a normal A5 would be.
The binder seems very well made and doesn’t appear to use any stiffening within the covers, so it opens flat immediately. There is a large, double-width, top-opening pocket on the outside covers, which effectively makes them doubly thick. There are two pockets inside each cover, and an adjustable pen holder, as well as a simple loop-style fastener. All very nice really.
I hadn’t ordered any leaves, and the binder just came with the one shown. In part 2 of this post I’ll show you how I’ve prepared my note-taking set-up.
One of the long-standing dilemmas facing us is that of which format to use. In particular, I have seen much soul-searching here on Philofaxy about whether to opt for personal or A5. And, having decided one way, it seems a nagging feeling often starts that maybe the other way would be better.
I have always stuck firmly to personal myself, and it would be unthinkable for me to change, if only because the continuity of all my paper records would be broken. For me, personal is the ideal size for keeping a diary, lists, addresses and finances. There is just one thing I’ve found it less than perfect for, and that’s note-taking. The pages are just that bit too small and the rings intrude that bit too much for real comfort when writing at length.
Thus, even I, as a personal format devotee, was intrigued recently to discover a Japanese invention that aims to give the best of both personal and A5 formats in one. A company called Ashford has come up with a new format called HBxWA5. The “H” here refers to the page height, and B stands for Bible, which is the name used to refer to personal size in Japan. The “W” refers to the page width, and A5 is as you would expect (i.e. the ISO A5 standard paper size). So what we end up with is a hybrid – basically a widened personal leaf that extends to the width of A5.
As I’ve implied, A5 has never been a temptation for me, but HBxWA5 was different. The holes are all still in the “right” places, and it might at last let me make notes comfortably. So I felt compelled to give it a try.
Ordering from Japan is more of an adventure than my typical internet shopping. I used Rakuten, which allows you to make the order, including payment details, and then passes it to the particular shop/vendor to be processed. This does take a while to happen, and leaves you wondering for a few days as to what the postage and packing is going to come to, but it all seems to work fine, and my parcel arrived a couple of weeks later.
The leather on the binder I ordered is black, with contrast stitching in an unusual and attractive purple colour. The rings are at the same places that personal format uses, and have a 15mm inside diameter. I’m hoping this will be more portable than a normal A5 would be.
The binder seems very well made and doesn’t appear to use any stiffening within the covers, so it opens flat immediately. There is a large, double-width, top-opening pocket on the outside covers, which effectively makes them doubly thick. There are two pockets inside each cover, and an adjustable pen holder, as well as a simple loop-style fastener. All very nice really.
I hadn’t ordered any leaves, and the binder just came with the one shown. In part 2 of this post I’ll show you how I’ve prepared my note-taking set-up.
Labels:
A5,
Deskfax,
guest post,
Other Sizes
05 March 2015
Guest Post - York Director Deskfax - Alan
Thank you Alan for this guest post, and I look forward to meeting Peter Layvine this summer.
This is a followup to Steve's wonderful post about receiving a personal York, about my matching Brand New In Box (BNIB for people used to text-speak) York Director Deskfax. I also feel I owe Peter Laywine this post.
Last spring, I was corresponding with Peter, who runs an eponymously named fine pen and organizer store, about his annual spring sale. As the Deskfax Group had recently been set up on Facebook, I also asked him about Deskfax items, particularly punches, which several people were looking for. Peter mentioned that he had a York Director Deskfax in the back that he was putting on sale. When I popped into his store, he was not there, but one of his staff got it out.
The regular price was $425 and the staff member said it was 50% off. I had never paid that much for an organizer, but it was lovely.
So I bought it. A week later, I was back in the store and saw Peter. “Did you buy the Deskfax?” “Yes?” He laughed, “Well enjoy it, it was only supposed to be 25% off!” This post is the long-overdue “Thank You!” to Peter.
The Deskfax came with many inserts, which I have removed. As you can see the layout of the Deskfax is somewhat different than the personal. Whereas the personal has a unzipped full-length pocket behind the cardslots, the Deskfax has a secretarial pocket and a zipped pocket. The inside back cover of the Personal is where you find the zipped pocket, which has a slot for taking a pad of B5 paper in the Deskfax.
I have posted on Facebook about my setup, but I will share it here briefly. I created an Excel file that allows me to have the identical week on one page layouts in my Deskfax, which stays in my home office, and my slimline personal.
I only carry one term, four months, at a time. It is a VERY awkward system to get right for printing, but I only have to do this three times a year. I will be exploring software that would make this process easier.
This is a followup to Steve's wonderful post about receiving a personal York, about my matching Brand New In Box (BNIB for people used to text-speak) York Director Deskfax. I also feel I owe Peter Laywine this post.
Last spring, I was corresponding with Peter, who runs an eponymously named fine pen and organizer store, about his annual spring sale. As the Deskfax Group had recently been set up on Facebook, I also asked him about Deskfax items, particularly punches, which several people were looking for. Peter mentioned that he had a York Director Deskfax in the back that he was putting on sale. When I popped into his store, he was not there, but one of his staff got it out.
The regular price was $425 and the staff member said it was 50% off. I had never paid that much for an organizer, but it was lovely.
So I bought it. A week later, I was back in the store and saw Peter. “Did you buy the Deskfax?” “Yes?” He laughed, “Well enjoy it, it was only supposed to be 25% off!” This post is the long-overdue “Thank You!” to Peter.
The Deskfax came with many inserts, which I have removed. As you can see the layout of the Deskfax is somewhat different than the personal. Whereas the personal has a unzipped full-length pocket behind the cardslots, the Deskfax has a secretarial pocket and a zipped pocket. The inside back cover of the Personal is where you find the zipped pocket, which has a slot for taking a pad of B5 paper in the Deskfax.
I have posted on Facebook about my setup, but I will share it here briefly. I created an Excel file that allows me to have the identical week on one page layouts in my Deskfax, which stays in my home office, and my slimline personal.
I only carry one term, four months, at a time. It is a VERY awkward system to get right for printing, but I only have to do this three times a year. I will be exploring software that would make this process easier.
23 June 2014
A paper punch suitable for Deskfax size Filofax organisers
There has been a recent resurgence of interest in DeskFax organisers, whilst they are no longer in production, their size is quite preferable for some people, slightly bigger than A5, but not as huge as an A4 when fully open.
There are plenty of examples popping up on Ebay that people have successfully bid for and Karine set up a Facebook group to bring interested parties together.
Inserts are still available from Filofax although a little limited in range. Philofaxy inserts work if you scale them down to 84% of the original.
Deskfax uses B5 size paper (176 x 250mm) which is quite hard to come by, but a lot of people have been buying Letter size or A4 size paper in 500 sheet packs and getting it cut to size by Staples or Office Depot or similar outlets.
That left just one thing from the jigsaw puzzle to solve.... a paper punch that can punch Deskfax paper. It is possible to do using existing punches such as the KW Trio and I created a video to show how to set it up to do Deskfax in a double punching arrangement.
However, a trawl of the Internet produced a Multi Punch sold through Filofax Germany that will punch Deskfax as well as other Filofax sizes, but it wasn't cheap. So we continued our search...
We then came across an adjustable punch sold with 6 punch dies and initially set up for Filofax A5, but it was capable of all sizes up to A4, this looked promising. An enquiry with the company selling the punch revealed they also sell spare punch dies in packets of 2. So I ordered a punch and two packs of punch dies. This would give me 10 in all, so a spare one. It arrived whilst I was in UK so I've not had a chance to set it up until now.
Now as I have numerous other punches for A4, A5, Personal etc size Filofax organisers I intended to set this one up and dedicate it to Deskfax size, I suspect other Deskfax owners would do the same. Once set up you would have a reliable means of punches new pages without a lot of setting up each time.
Fitting the additional punch dies is a little bit fiddly, but not too difficult to do with a small pair of needle nose pliers.
So let us look at the punch in detail and I will explain what you get etc.
So this is the box, nothing outstanding here really, it does include some information about setting it up for A5 naturally. There is a sheet of instructions as well.
This is the punch itself and the eagle eyed amongst you will spot that I've set it up for 9 holes already!
Turn it around and you will see the nine punches.
The punches are spaced 19 <-> 19 <-> 50 <-> 19 <-> 19 <-> 50 <-> 19 <-> 19mm for Deskfax.
To set the spacing correctly I installed the central punch first and then measured the spacing accurately by lining the edge of adjacent punches to same edge with a ruler. I then checked the setting my inserting a sheet of pre-punched Deskfax paper into the punch and look through the punched holes to check the alignment.
Remove the plastic paper chad catcher and this reveals the bottom of the punch.
Now there is a small modification required, so zooming in on the middle three punches. The centre one has its own hole in the base for the chads to escape through. But if you look at the left hand one you will notice that the exit hole is slightly obscured. This is how the punch came from the suppliers.
This picture does also show the right hand one in the group not obscured, after removing the punch block I filed out the slot with a round metal file to allow for clearance for the paper chads to exit the base of the punch block unheeded, it took me a few minutes to do this but it is worthwhile doing in the long term. I will do the left hand one now I've photographed the 'as supplied' and 'as modified' pictures, but I wanted you to see how it arrives.
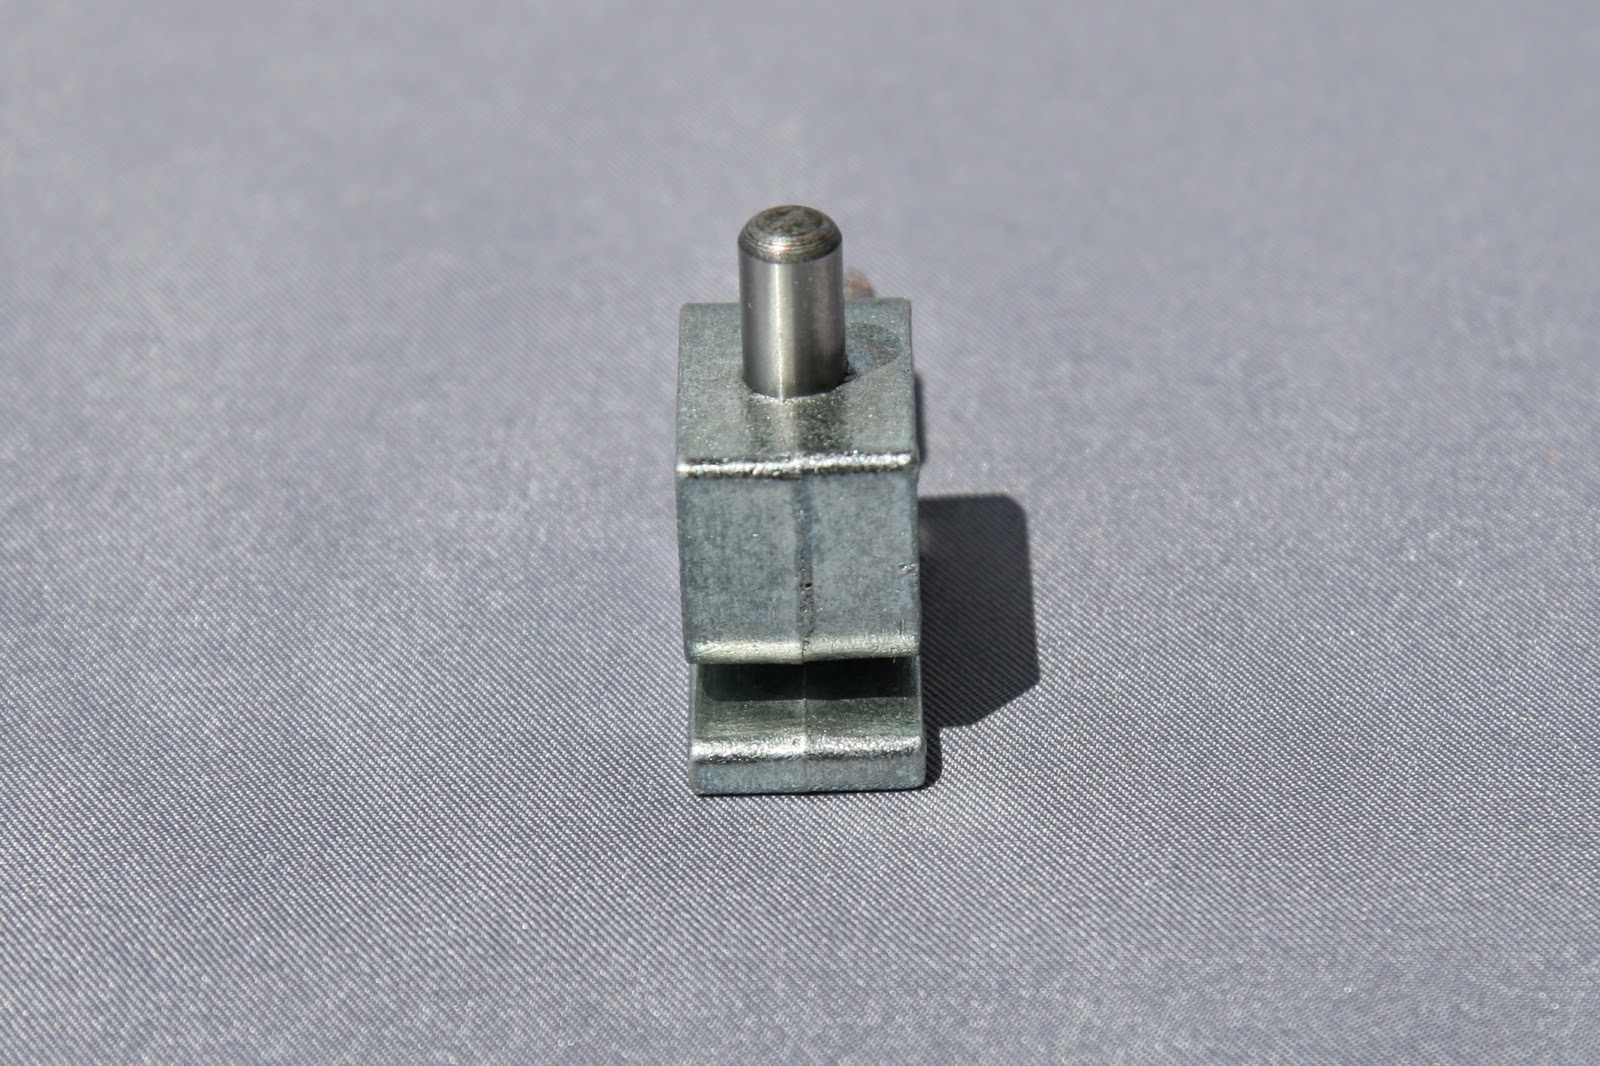
These are the removable punch dies, the knurled and slotted screw on the right in the picture below holds it at the right point on the punch. As you can see the punch has capacity for about 5 sheets of paper, depending on the thickness of paper of course.
With 9 punch dies to press down on you really need to eat your Weetabix in the morning if you are going to use this set up, but I guess it would be the same for any 9 hole punch. I've found that it is best to use the punch on a good solid surface. The punch remains where you place it and you can use one hand to steady the paper and the other to press the lever down.
Overall I'm pleased we have found an economical and reasonably available solution for Deskfax users.
The links below will take you to the punch and the additional punch dies which come in packs of 2 so you will need to order two packs.
There are plenty of examples popping up on Ebay that people have successfully bid for and Karine set up a Facebook group to bring interested parties together.
Inserts are still available from Filofax although a little limited in range. Philofaxy inserts work if you scale them down to 84% of the original.
Deskfax uses B5 size paper (176 x 250mm) which is quite hard to come by, but a lot of people have been buying Letter size or A4 size paper in 500 sheet packs and getting it cut to size by Staples or Office Depot or similar outlets.
That left just one thing from the jigsaw puzzle to solve.... a paper punch that can punch Deskfax paper. It is possible to do using existing punches such as the KW Trio and I created a video to show how to set it up to do Deskfax in a double punching arrangement.
However, a trawl of the Internet produced a Multi Punch sold through Filofax Germany that will punch Deskfax as well as other Filofax sizes, but it wasn't cheap. So we continued our search...
We then came across an adjustable punch sold with 6 punch dies and initially set up for Filofax A5, but it was capable of all sizes up to A4, this looked promising. An enquiry with the company selling the punch revealed they also sell spare punch dies in packets of 2. So I ordered a punch and two packs of punch dies. This would give me 10 in all, so a spare one. It arrived whilst I was in UK so I've not had a chance to set it up until now.
Now as I have numerous other punches for A4, A5, Personal etc size Filofax organisers I intended to set this one up and dedicate it to Deskfax size, I suspect other Deskfax owners would do the same. Once set up you would have a reliable means of punches new pages without a lot of setting up each time.
Fitting the additional punch dies is a little bit fiddly, but not too difficult to do with a small pair of needle nose pliers.
So let us look at the punch in detail and I will explain what you get etc.
So this is the box, nothing outstanding here really, it does include some information about setting it up for A5 naturally. There is a sheet of instructions as well.
This is the punch itself and the eagle eyed amongst you will spot that I've set it up for 9 holes already!
Turn it around and you will see the nine punches.
The punches are spaced 19 <-> 19 <-> 50 <-> 19 <-> 19 <-> 50 <-> 19 <-> 19mm for Deskfax.
To set the spacing correctly I installed the central punch first and then measured the spacing accurately by lining the edge of adjacent punches to same edge with a ruler. I then checked the setting my inserting a sheet of pre-punched Deskfax paper into the punch and look through the punched holes to check the alignment.
Remove the plastic paper chad catcher and this reveals the bottom of the punch.
Now there is a small modification required, so zooming in on the middle three punches. The centre one has its own hole in the base for the chads to escape through. But if you look at the left hand one you will notice that the exit hole is slightly obscured. This is how the punch came from the suppliers.
This picture does also show the right hand one in the group not obscured, after removing the punch block I filed out the slot with a round metal file to allow for clearance for the paper chads to exit the base of the punch block unheeded, it took me a few minutes to do this but it is worthwhile doing in the long term. I will do the left hand one now I've photographed the 'as supplied' and 'as modified' pictures, but I wanted you to see how it arrives.
These are the removable punch dies, the knurled and slotted screw on the right in the picture below holds it at the right point on the punch. As you can see the punch has capacity for about 5 sheets of paper, depending on the thickness of paper of course.
With 9 punch dies to press down on you really need to eat your Weetabix in the morning if you are going to use this set up, but I guess it would be the same for any 9 hole punch. I've found that it is best to use the punch on a good solid surface. The punch remains where you place it and you can use one hand to steady the paper and the other to press the lever down.
Overall I'm pleased we have found an economical and reasonably available solution for Deskfax users.
The links below will take you to the punch and the additional punch dies which come in packs of 2 so you will need to order two packs.
Subscribe to:
Posts (Atom)