Showing posts with label Photography. Show all posts

22 February 2024

Film Photography Recording Insert

As some of you might know I've been a keen amateur photographer for a number of years... decades even! For nearly 20 years now I've been using digital photography as my main method of capturing images. Prior to that and since being a teenager I have used film for all my photography.

Over the years I've owned a number of different film cameras, I still own a few of them from a Kodak Instamatic 25 camera to a more recent Canon EOS 30 Single Lens Reflex (SLR) film camera.

My use of film has dropped dramatically over time, but I have maintained an interest in it on an occasional basis. I've recently gone back to shooting a few rolls of film each year. 

Like a lot of other analogue things (planners included!) there has been a resurgence in people wanting to go back to using film photography, in the same way that there has been an increase in the number of LP vinyl records sold in the last few years.

I decided that this year I should do some more film photography. It is quite a challenge after using digital photography with the benefits of instantly being able to see your results. It has also become quite expensive as well in recent years, not only the cost of the film but getting it processed as well. 

To help with my understanding of the results of the pictures I hope to take this year I decided I needed to record the details of the photographs I take so I can look back and see the settings I had used.

One of the very first Filofax inserts I created/recreated was the Photography Exposure Record, I had some of these old Filofax inserts from the 1980's but they are no longer available.

Having used my own version I decided that there were a couple of things I could do to improve on the original version.

1980's Photo Exposure Record insert

Like the original I decided to do it in Personal size because this is very easy to carry around in my camera bag and it lends it self well for note taking whilst out and about. I also kept it in landscape format so that the rings don't get in the way, even less so in a slimline organiser. In the photos it is in a Holborn, but I also have a Finsbury which has smaller rings.


Original version at the top and the new version below

The reverse side is the same format, printed on to Filofax Plain paper

I'm sharing these inserts with you so if there any of you that are film photographers then you can use them too.

Photo Insert to be printed on Personal size paper: Word or PDF
Photo Insert to be printed on Personal on A4 sized paper: Word or PDF

Of course I could have used a smart phone app, or a simple notebook, but where is the fun in that!

26 February 2017

Film Photography Recording Insert

As some of you might know I've been a keen amateur photographer for a number of years... decades even! For over 10 years now I've been using digital photography as my main method of capturing images. Prior to that and since being a teenager I have used film for all my photography.

Over the years I've owned a number of different film cameras, I still own a few of them from a Kodak Instamatic 25 camera to a more recent Canon EOS 30 Single Lens Reflex (SLR) film camera.

My use of film has dropped dramatically over time, but I have maintained an interest in it on an occasional basis.

Like a lot of other analogue things (planners included!) there has been a resurgence in people wanting to go back to using film photography, in the same way that there has been an increase in the number of LP vinyl records sold in the last few years.

I decided that this year I should do some more film photography. It is quite a challenge after using digital photography with the benefits of instantly being able to see your results.

To help with my understanding of the results of the pictures I hope to take this year I decided I needed to record the details of the photographs I take so I can look back and see the settings I had used.

One of the very first Filofax inserts I created/recreated was the Photography Exposure Record, I had some of these old Filofax inserts from the 1980's but they are no longer available.

Having used my own version I decided that there were a couple of things I could do to improve on the original version.

1980's Photo Exposure Record insert

Like the original I decided to do it in Personal size because this is very easy to carry around in my camera bag and it lends it self well for note taking whilst out and about. I also kept it in landscape format so that the rings don't get in the way, even less so in a slimline organiser. In the photos it is in a Holborn, but I also have a Finsbury which has smaller rings.


Original version at the top and the new version below

The reverse side is the same format, printed on to Filofax Plain paper
I'm sharing these inserts with you so if there any of you that are film photographers then you can use them too.

Photo Insert to be printed on Personal size paper: Word or PDF
Photo Insert to be printed on Personal on A4 sized paper: Word or PDF

Of course I could have used a smart phone app, or a simple notebook, but where is the fun in that!

27 March 2013

Five quick tips for better Filofax photography


Zoe is a Filofax lover from Australia (pink Domino A5). Her blog, Zoe at Home, is about simplifying, downsizing and small-space living. And of course, organising your life with the help of a great planner!


We all know a picture is worth a thousand words, right? Well, there’s no need to learn Photoshop or buy an expensive camera to make great pictures of your Filofax for your blog. In fact, even with just a smart phone, some free software and a few simple tricks, you can develop a style of photography that really tells the story of how using your Filofax enhances your life and bring new visitors to your blog at the same time.

1. Get the best light. The easiest thing you can do to improve your pictures is to shoot in great lighting conditions. Natural light is the best, so try to shoot in the middle of the day, near a window or outside. Shooting against a white backdrop will amplify the available light. If you’re shooting inside, you might still need to supplement the natural light with a lamp or overhead light. I think fluorescent light is fine- you don’t need to buy special photographic lights.


I set up a makeshift ‘studio’ near my front door, because there are lots of windows there and I can turn on my hallway light if I need to. The walls are white, and I put my Filofax on this white table so there’s little ‘background noise’ in my pictures. I’ve worked out that the best time to take photos here is early in the afternoon on a clear day, when there is no direct sun shining which tends to ‘wash out’ my pictures.

2. Consider the background. People will see not only your Filofax, but what is around it too, so pay attention to the background. I just use the white table for my backdrop, but depending on your style, you could use a roll of gift wrap or a sheet of washi paper. If you have a pretty piece of fabric, you could lay it on the ground near a window and take your pictures there, as long as the pattern isn’t too busy as it will compete with your planner. If you want a white background but don't have a white table, just use a roll of white paper and reflect some light onto it with a table lamp.

One thing you could try is to take your Filofax for a walk─ seriously! Take it with you to your local café, market or park and photograph it in the context of your life. I love seeing Filo photos that give a little insight into how people in other countries live.

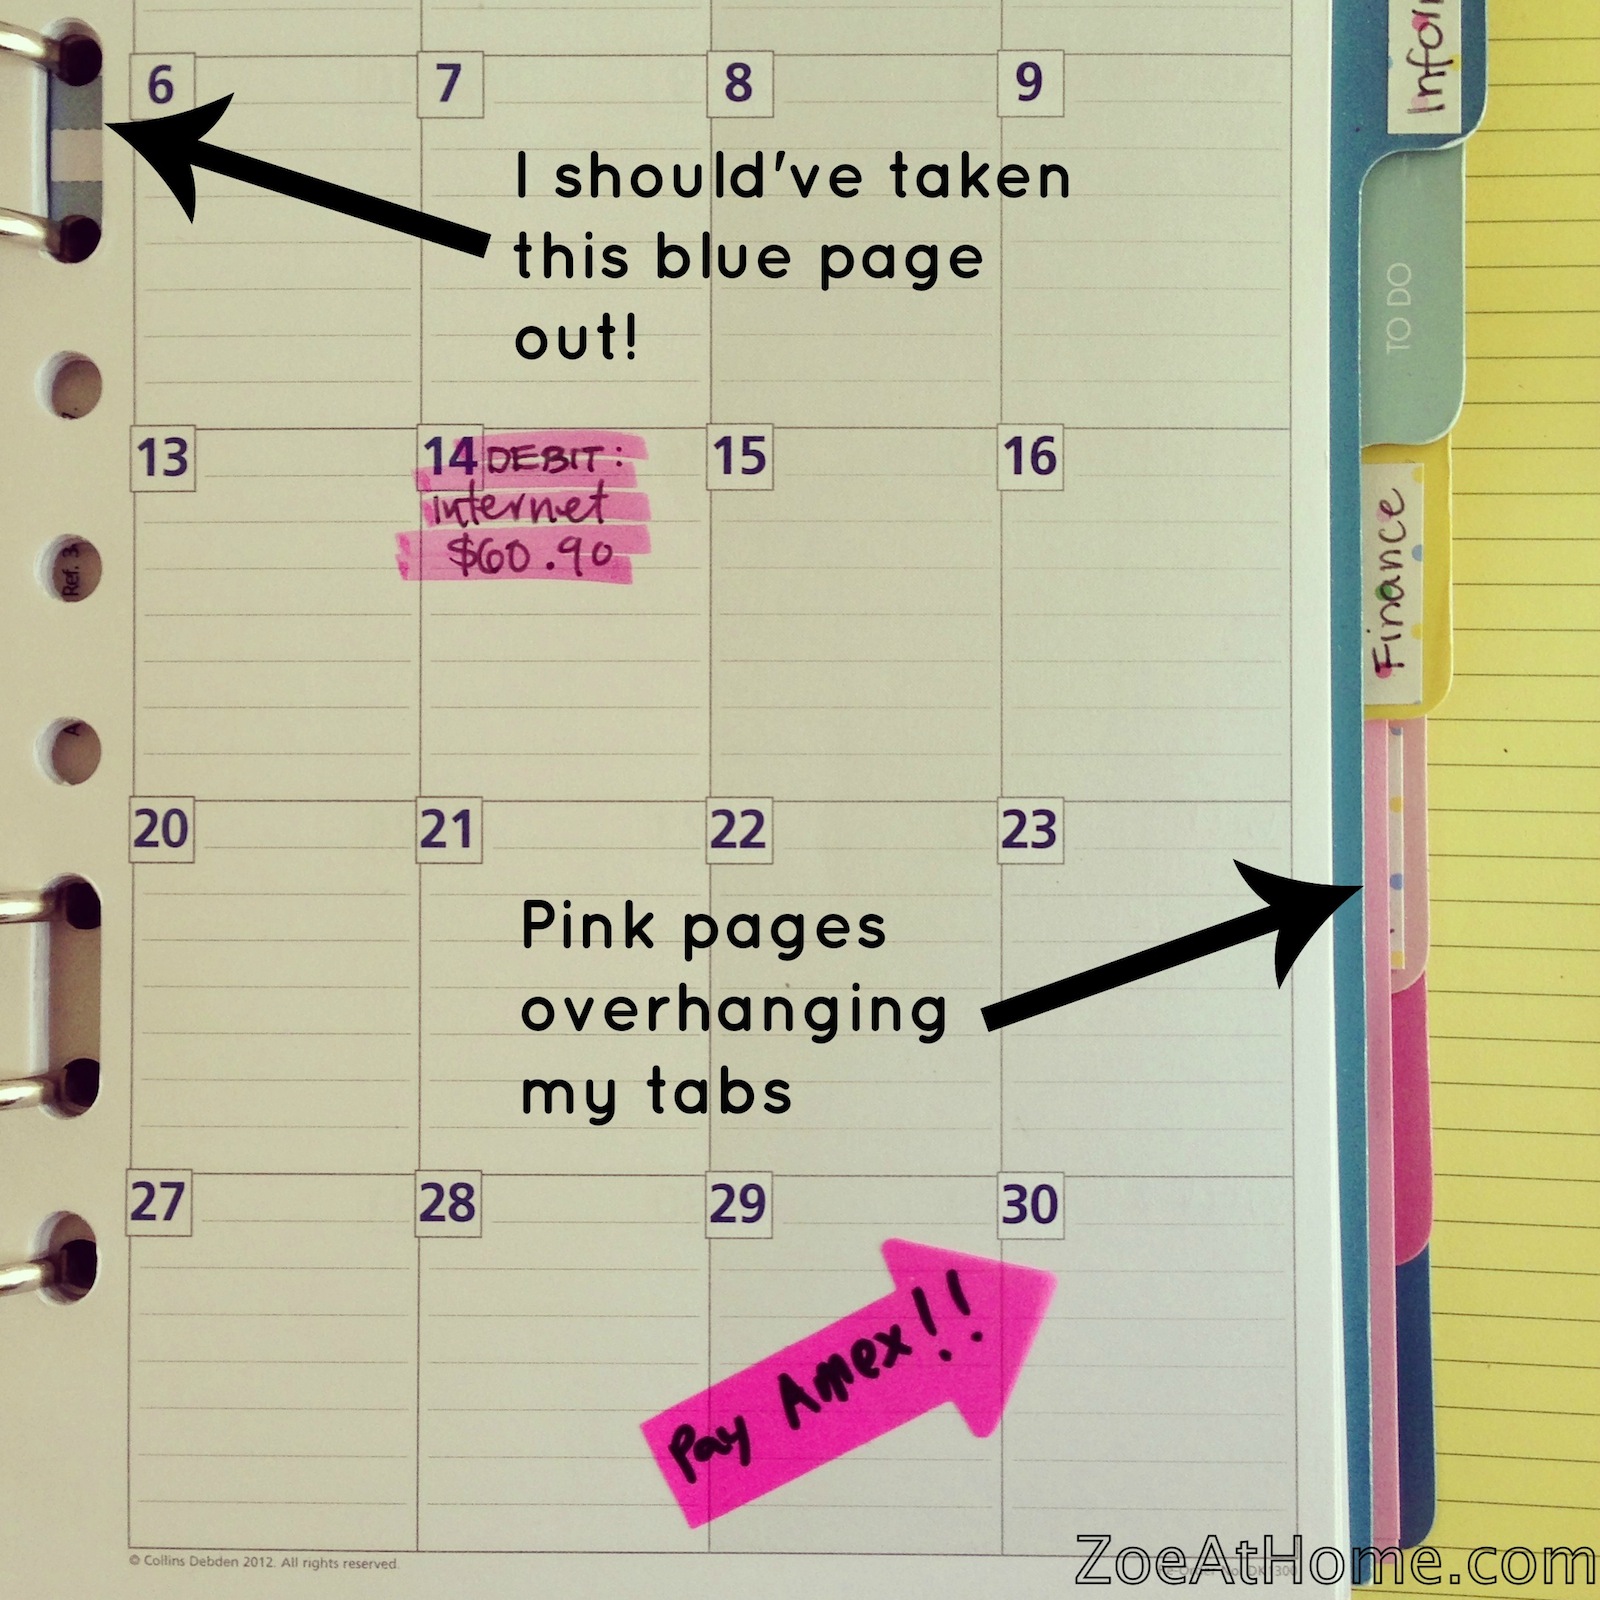
3. Tidy up your pages. You might need to remove some pages, or at least line them up at the edges. In real life, our planners are stuffed to capacity, with lots of memos and sticky notes crammed in, but this makes for busy-looking photos. I often use a blank page if I just want to show how I’ve set up my planner. I think white space makes Filofax pictures ‘read’ better on small screens.


4. Stylise your shots. Try to develop a unique style for your shots that reflects the look and feel of your blog in general. A great way to develop your branding is through your photos. On my blog, I always use a square format and the same filters for all my photos. Also, I try to always be aware of how the feature photo of each post will look on my homepage. You could also add a pretty watermark or colourful border so some cute overlays. Just be consistent, to make your pictures easy to recognise.

5. Optimise your pictures for social media sharing. Philofaxy has a ‘no-Pin’ policy, and I can understand the very good reasons for this, but on you own blog, don’t overlook Pinterest as a great way to attract new visitors. Whenever I check my stats, there are always referrals from people who have pinned my pictures, and this number grows every week. Or consider Facebook sharing: people are more likely to click through if there is a photo showing them the attractively-presented content they will find on your site.

I don’t worry about people ‘stealing’ my photos on Pinterest. To me, it’s not stealing, it’s sharing, and it brings new visitors to my blog. If I’ve taken a great photo that people want to pin, I know I can take more great photos that will be just as popular. I just assume that any photo could be pinned, so I watermark everything before uploading it. This is also important in case the links get broken which can happen when things go viral. I use iWatermark Pro by Plum Amazing, which cost me about $30.

To make your images attractive to Pinterest users, you need to create a collage of some sort, with some great photos and a headline that draws people in.  [I will be making mine as unattractive as possible to Pinterest users! - Steve]


I put this picture on the Coming Soon page of my blog, and I couldn’t believe how many times it got pinned and re-pinned before this series was even published. So I spent some time analysing what made it ‘pinnable’:
  • The headline: a lot of Pinterest users are interested in personal organisation.
  • The colours: the use of pink is very feminine (most pinners are female) and the repetition is pleasing to the eye.
  • The Filo shots: there are a lot of Filofax fans on Pinterest.
  • The promise of more if you click through: it gives the impression that there will be hints on a range of aspects of personal organisation in the post. The image tells a little story about what my blog is about.
You can create a collage like this using free software called PicMonkey. It’s free and simple to use: you just load up your pictures, create your masterpiece, and save it to your computer.

Finally, there’s no need to spend hours editing your photos to perfection. Just get the basics right. A post with a good photo is always better than a post without one, or no post at all. So show, don’t tell the world how Filofax helps you live life to the full!

Thank you Zoe for your guest post, I will admit to admiring your photos on your site before now. It was great to get a different viewpoint on a topic we have previously covered. 


Of course if any one would like to revisit a topic with a guest post on Philofaxy then please get in touch philofaxy [at] gmail [dot] com

18 August 2011

Photographing Your Filofax Collection

I know that pictures of different organisers are always popular and I know people love sharing pictures of their latest set up or new purchases.

I've been a keen photographer for a number of years and since I started blogging on Philofaxy I've been trying to improve my own techniques to take better pictures of my organisers.   So here are some tips on how to take better pictures.

Firstly Filofax organisers aren't the easiest subjects to take photographs of, sure they stay still when you tell them to, but they are relatively small, so in normal circumstances you will be quite close to your subject.

So my first tip, try to use natural light were possible, either next to a sunny window or like I often do, on a table outside. What ever camera you use the more natural the light, then there will be quite an improvement in your pictures. With indoor lighting or with flash your camera has to try to make up for the lack of light and so on digital pictures they will look noisy and also they will look quite flat and lack sharpness.


Try to take pictures from different angles, or zoom in on a particular feature or part of the design like I did with this shot:


I often crop my photos afterwards on the computer, but I don't change many settings just crop and save with most of them. It gets rid of wasted space in the photograph and concentrate on the Filofax not the surroundings.

By taking your pictures in sunlight you have better control of the 'depth of field', this is the range of distance between your camera and the background that is fully in focus.

Here is a classic example of very 'shallow' or narrow depth of field, the rings are in focus, but the pen in the foreground is totally out of focus and the address card in the clear envelope gets progressively out of focus the further away it is. 


This technique can be used to your advantage if you are trying to get rid of a distracting background.  By taking your pictures on a plain background and in good light you can avoid these problems of things being out of focus like in the following picture of the Aston:


If your camera lens can take filters, try fitting a polarising filter to your lens, I've found this can reduce the 'glare' you get off the shiny surface of the leather organiser and it then brings out the natural colour of the leather.

When you are taking photographs of the interior of your Filofax to show off your inserts, try to show them with some content on the pages, even if you have to create some 'dummy' entries, which I will hold my hand up to doing before now!!

In fact, the plan is of our house here, but you didn't know that until now!

Even if you only need two or three pictures for your blog post, take plenty of pictures, it's far easier to discard them at a later date after you have written your post than to have to set it all up again, like I had to do once. I took a series of pictures, took all the organisers inside and then noticed another one sat on the table.... 'Doh' back outside again start again!

The more pictures you take the better your technique becomes anyway, so try varying the camera position and angle, stand back a little and zoom in. Small changes can make quite a difference some time.

In full sunlight be careful where you stand as you don't cast a shadow across the subject.

So it is now time to take the lens cap off and try taking some more pictures... enjoy.