
Like many many Filofax lovers and users out there, I am hugely disappointed that Filofax is one oft he few that doesn’t spoil us with MO2P inserts. Boxes and tabbed please!
Well, we could surely wait until we are in our eighties, because – you know – one day they might actually listen to us!
Or … we could just make them ourselves. That’s what I did and I must say I’m very pleased with the result:
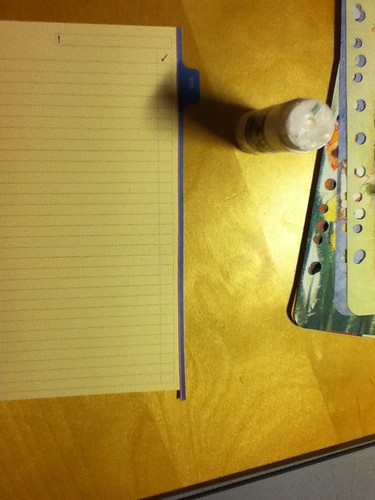
On the front page there’s a list of To do items with check boxes. This is where I can note work-related to do’s of that specific month:
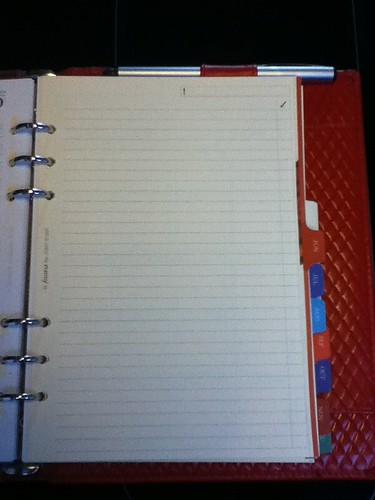
Same sheet is on the backside of the monthlies. This is where household, private and family related to do’s can get noted. I use colour coding, so private stuff gets written in purple, limegreen is household and pink is family.

And now we get to the crafting part.
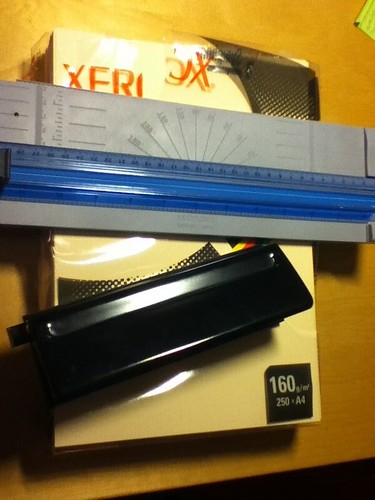
These are the supplies needed:
1) 160g heavy printer paper. I had the colour Ivory already at home, and it turned out to be the exact same colour as the standard cream coloured Filofax tabs!
2) A paper cutter
3) A Filofax hole punch
4) A sample page of your favourite Filofax paper for the front and back of the MO2P. I chose the Todo pages from Sweden. Love them, cos you can have such long Todo lists on one page!
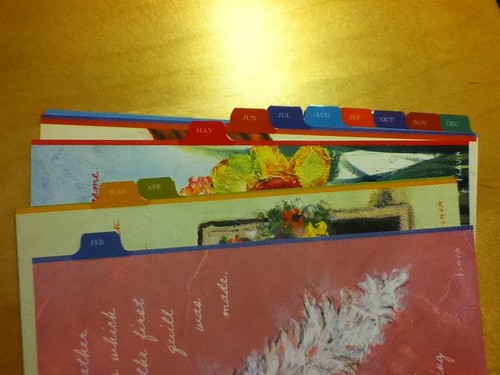
5) Tabs. I chose last years Daytimer Flavia inserts in Classic size, which I still had.

First you need to slice the A4 paper exactly in half to have 2 A5 sheets. With a paper cutter that’s just a breeze!
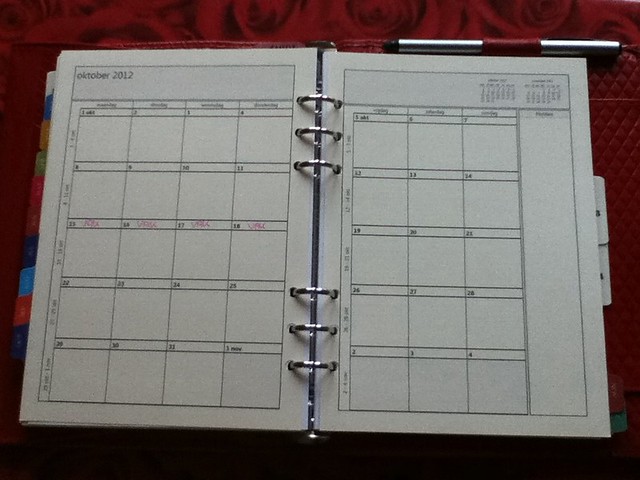
Next you put the paper in your printer (I used an Inkjet). Next: go to the Outlook calendar and print out Two pages per month. Now, this won’t work well if you actually USE Outlook as your calendar, because then you’ll have all those appointments and notes on your printed pages. Unless you’d want that, of course. Outlook lets you chose A5 format in the page setup. You then get to choose the begin and end date. Otherwise, if you are on the 10th of the month, it will print the current week, plus 4 more. Now that’s just plain stupid! I got to work around that, but not all months are to my satisfaction (e.g. “august” on my month says “juli 2012 – September 2012” – DUH!). There’s probably a good solution for it, but I got frustrated trying and just settled. Leaves me more time to play around with my Filofax, ya know?
After I had punched the pages, I placed the Swedish ToDo sheet on my copier (one of the advantages of an All-in-one-printer ;-)) and first copied it to all the front pages of the month, then I turned the sheet on the copier and printed the backsides. That way, I ensured that there was enough space for the holes.
Next step: cut the tabs off the old tabsheets. Like this:

Obviously I could have chosen to only cut of the tab itself, but I was getting lazy and figured this would make aligning the tabs so much easier. I was – however – wrong about that. I’ll show you in a minute.
Now I put glue to the tab and stuck it on my monthly page. Since the Daytimer Classic format is slightly longer than Filofax A5-pages, I needed to cut of the last millimeters at the bottom:
In theory this should have worked brilliantly. Until I got to December and discovered that the darn tab didn’t fit completely on my monthly page. So I had to cut some at the top and the bottom.

And that’s why the December tab seems to hide a bit behind the November tab. Maybe he’s shy?
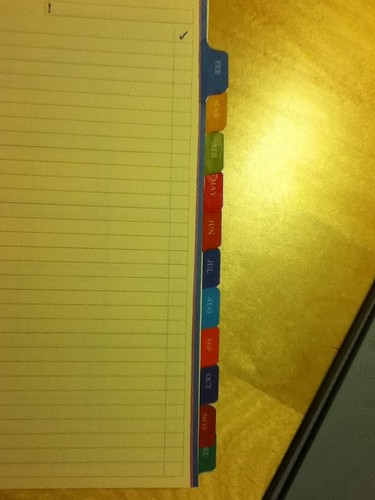
Still, I’m extremely pleased with the result! Here’s a picture of the tabs in my A5 purple Finchley (sorry about the glare):

And in my A5 Adelphi:

The thick paper is lovely to use and write on. It’s thicker than the normal Filofax register tabs, but thinner than the monthly pages in the Erin Condren planner.
Thank you Jotje for sharing this very creative project with us. You might be interested to know that Ray and I have some Monthly insert designs that we will be releasing soon.
Very nice - thanks for posting. I have some similar cream to do sheets from Filofax Denmark. Does anyone know why the checkbox columns are on opposite sides of the page? Just curious...
ReplyDeleteWOW :D
ReplyDelete@Gerard: my guess would be to keep them on the side furthest from the rings. It's easier to write on the edge of the paper, instead of the inside next to the rings.
ReplyDeleteWow, great post! I would love to do something like this in theory. But I'm afraid I don't have much patience with gluing and aligning things. If it didn't come out perfectly, I couldn't use it. But I just might have to look into something where the personal size is concerned...
ReplyDeleteThanks for sharing!